Easy Step by Step Guide on How to Make All-Natural Bath Bombs
A good bath bomb should fizz, smell lovely, and leave the bath feeling special without leaving skin irritated or the tub coated in mystery ingredients. Making them at home gives you full control over what touches your skin, from the oils to the colors to the scent.
All-natural bath bombs are simple once you understand the balance. Dry ingredients create the fizz. A small amount of oil helps hold everything together. Essential oils add scent, and natural powders can add soft color without synthetic dyes.
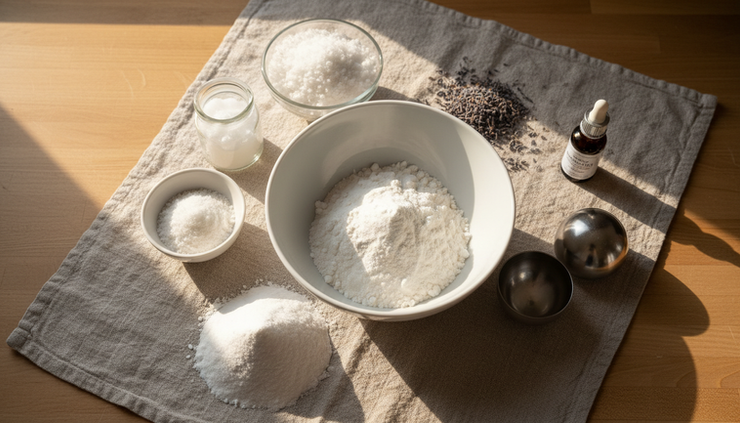
Why natural ingredients are better for bath bombs
Bath bombs sit in warm water against your skin, so the ingredient list matters. Natural ingredients help you avoid harsh artificial fragrances, synthetic dyes, and unnecessary fillers that can bother sensitive skin.
That does not mean every natural ingredient works for everyone. Essential oils are concentrated, and some people react to certain oils, herbs, or botanicals. Use gentle amounts, choose skin-friendly ingredients, and skip anything that has caused irritation before.
For the best results, keep your formula simple. A bath bomb does not need glitter, neon color, or a strong perfume cloud to feel luxurious. Soft fizz, a light scent, and nourishing oils are enough.
A clean ingredient list makes bath bombs easier to customize and gentler for everyday self-care.
Essential ingredients and what they do
Here are the core ingredients for a basic batch of all-natural bath bombs.
Ingredient | What it does | Why it helps |
Baking soda | Forms the base of the bath bomb | Softens the feel of bath water and helps create fizz |
Citric acid | Reacts with baking soda | Creates the classic bubbling effect |
Cornstarch or arrowroot powder | Slows the fizz | Gives the bath bomb a smoother texture |
Epsom salt | Adds mineral texture | Helps create a soothing bath experience |
Carrier oil | Binds the mixture | Adds a light moisturizing feel |
Essential oils | Adds natural scent | Lets you customize the mood of the bath |
Natural colorants | Adds color | Creates pretty shades without synthetic dyes |
Good carrier oils include coconut oil, sweet almond oil, jojoba oil, olive oil, and grapeseed oil. If allergies are a concern, avoid nut-based oils and choose a simple option like jojoba or grapeseed.
For natural color, try:
Pink clay Soft rose or blush tones
Turmeric Warm yellow, used in a tiny amount because it can stain
Spirulina powder Soft green, best in small amounts
Cocoa powder Warm tan or light brown
Beetroot powder Pink to reddish tones, depending on amount

Step-by-step guide to making all-natural bath bombs
This recipe makes about 4 medium bath bombs, depending on mold size.
Gather your supplies
You will need:
1 cup baking soda (https://amzn.to/4hcbsFy)
1/2 cup citric acid (https://amzn.to/46YkEZg)
1/2 cup cornstarch or arrowroot powder (https://amzn.to/4rzMyo9) (https://amzn.to/3T9a0eP)
1/4 cup Epsom salt (https://amzn.to/3UYiciL)
2 tablespoons carrier oil (https://amzn.to/4jdwHsS)
10 to 20 drops essential oil (https://amzn.to/473DsGu)
1 to 2 teaspoons natural colorant, optional
Witch hazel or water in a fine mist spray bottle (https://amzn.to/4yKf20I)
Bath bomb molds or silicone molds (https://amzn.to/4yFVnPl) (https://amzn.to/4dI41Vo)
Mixing bowl and whisk
Mix the dry ingredients
Add baking soda, citric acid, cornstarch, and Epsom salt to a large bowl. Whisk well until the mixture looks even.
Break up clumps with your fingers or press the mixture through a fine sieve. A smoother mix packs better and creates a cleaner-looking bath bomb.
Add color carefully
If you are using a natural colorant, whisk it into the dry mixture now. Start with a small amount. Natural powders can deepen as they mix with oil and moisture.
For a marbled look, divide the mix into two bowls. Color one bowl and leave the other plain.
Stir in oils and scent
In a small cup, combine the carrier oil and essential oils. Slowly drizzle the oil mixture into the dry ingredients while whisking.
Go slowly so the liquid does not trigger too much fizz. The mixture should still look mostly dry, but it will start to hold together.
Mist until the texture is right
Lightly spray the mixture with witch hazel or water, one or two sprays at a time. Mix after each spray.
The right texture feels like slightly damp sand. Squeeze some in your hand. If it holds its shape without crumbling, stop adding moisture. Too much liquid can start the fizzing reaction early.

Pack the molds firmly
Overfill each side of a round mold, then press the halves together firmly. Do not twist. Gently tap the mold and release the bath bomb.
If using silicone molds, press the mixture tightly into each cavity. Smooth the top with your fingers.
Let them dry
Place the bath bombs on a towel or parchment-lined tray. Let them dry for at least 24 hours in a cool, dry place.
Humidity can make bath bombs soft or crumbly, so avoid making them in a steamy kitchen or bathroom. Once dry, store them in an airtight container.
Creative scent and color variations
Once the basic recipe feels easy, try small changes. Keep the same dry-to-wet balance, then switch the oils, colors, and botanicals.
Lavender calm bath bombs
Use lavender essential oil and a pinch of pink clay. Add a few dried lavender buds if you like, but use them lightly. Too many botanicals can float around the tub and make cleanup harder.
Citrus morning bath bombs
Use sweet orange or grapefruit essential oil with a tiny pinch of turmeric for a sunny yellow shade. Citrus oils can be bright and cheerful, but some can increase sun sensitivity when used on skin. Choose steam-distilled citrus oils when possible, or use very small amounts.
Eucalyptus mint bath bombs
Use eucalyptus and peppermint essential oils for a clean, fresh scent. Keep peppermint low, since it can feel intense on skin. A hint of spirulina gives a pale green color.
Vanilla cocoa bath bombs
Use cocoa powder for color and a natural vanilla extract made for body care, if available. Regular baking vanilla adds water and may affect the fizz, so use it sparingly or choose a skin-safe vanilla aromatic oil from a trusted supplier.

Tips for safer, skin-friendly bath bombs
Natural does not always mean irritation-free, so a few smart habits help.
Use essential oils in low amounts, especially for children or sensitive skin.
Avoid cinnamon, clove, and oregano essential oils in bath bombs, since they can feel harsh.
Skip glitter unless it is clearly biodegradable and skin-safe.
Test strong colors in a small bowl of water before using them in the tub.
Keep bath bombs dry until use so they do not activate early.
Be careful getting out of the tub, since oils can make surfaces slippery.
If you have very sensitive skin, allergies, eczema, or another skin condition, keep the recipe unscented or check with a qualified professional before using essential oils. This guide is for general information and does not replace medical advice.
The simple joy of homemade bath bombs
Homemade bath bombs are practical, pretty, and surprisingly easy once you learn the texture. Start with baking soda, citric acid, a gentle oil, and a light natural scent. Then build from there with clays, herbs, and soft colors that suit your skin and your bath routine.
Make one small batch first. Note what you like, adjust the scent or color, and keep the recipe simple. The best all-natural bath bombs are the ones that fizz well, feel good, and make your bath a little calmer without extra ingredients you do not need.


Comments